Introduction:
I have a Raspberry Pi 2 at home, which has been sitting and collecting malware using open source tools. In this post, I will be using a virtual machine on ESXi instead and setting up the collection.
Purpose:
Main purpose for now is to just document how to setup collection server.
Setup:
I will be using Ubuntu 16.04 Server and ESXi for this project.
I have a NAS containing all my malware, however, you don’t need to setup a dedicated NAS, if you don’t want to.
I will also be utilizing Tor. I want all my requests to go through Tor. It’s to protect me and to avoid alerts for the people monitoring my infrastructure.
VM Specs:
1 CPU core (I got Xeon E5507 @ 2.27GHz)
RAM: 1024MB (overkill but I plan to do more with this VM later)
Storage space: 8GB, again, I’m using a NAS for storage.
Installation:
- Install Ubuntu server. I didn’t do anything special. I have two network interfaces. One on LAN (for internet connection) and one connected to directly to my NAS.
- Assign static IP to your interfaces, if you need to.
- Setup automounting NFS share (NAS) in fstab, if you need to.
Maltrieve
- Run ‘apt-get update’
- Run ‘apt-get install python2.7 python2.7-dev python-pip’
- This will install required python packages.
- This is to clone the project we will be using to collect malware
- The repo was forked from https://github.com/krmaxwell/maltrieve
- We’re using it because of this https://github.com/krmaxwell/maltrieve/issues/182#issuecomment-284976575
- Cd into maltrieve
- Run ‘pip install -e .’
- Edit maltrieve.cfg file and comment out cuckoo_dist, unless you’re going to use it.
Tor and Privoxy
- Run ‘apt-get install tor privoxy’
- By default privoxy runs HTTP proxy on port 8118 but you still need to configure it to forward traffic to tor
- Tor runs socks proxy on port 9050.
- To configure privoxy, edit /etc/privoxy/config
- Locate the line ‘# forward-socks5t / 127.0.0.1:9050 .’ then remove ‘#’ from the front
- Locate ‘listen-address localhost:8118’ and change it to ‘listen-address 127.0.0.1:8118’
- For some reason, privoxy was only binding ipv6 address and not 127.0.0.1 and maltrieve didn’t like that.
- Save the file
- Run ‘service tor start’
- Run ‘service privoxy start’
Testing
- Now test out the proxy by running the following commands
- curl ifconfig.co
- For the results for above commands, you should get different IP addresses.
Now we have everything almost ready to go.
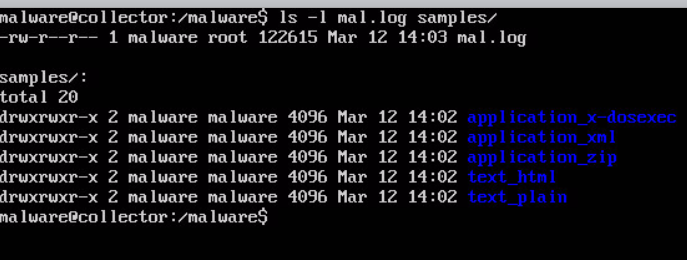
I am saving my malware data to /malware/samples and saving my log to /malware/mal.log.
Cron job will be used to download samples daily.
Edit your crontab file and add something similar to this:
00 03 * * * cd /home/malware/maltrieve && ./maltrieve.py -l "/malware/mal.log" -d "/malware/samples/" -p 127.0.0.1:8118 -s
This will run 3 AM every morning. It will also take all of the samples and put them in samples folder and organize them by MIME type.
You can test to see if this command works or not by running the command we put in crontab.

It seems to be downloading files. You can check the samples folder as well.
I have been running Maltrieve on my Pi for couple of months now. I'll find a place to share the samples soon.