Sunday, February 21, 2016

Extracting images from Crestron Airmedia communication

Few years ago, my school decided to put up bunch of TV's with Crestron Airmedia so students could share their screens. I decided to see if I could do anything interesting with them(take over the broadcast for example :-D). All the stuff below is from me trying to mess with Crestron Airmedia. I didn't find anything that I could use to do fun things but I learned something in the process.

I may or may not look at Airmedia software and communication again. Depends on how bored I get.

More information about Crestorn AirMedia:
http://www.crestron.com/products/airmedia_mobile_wireless_hd_presentations/index.html?from=www.crestron.com%2Fairmedia

http://www.crestron.com/resources/product_and_programming_resources/catalogs_and_brochures/online_catalog/default.asp?jump=1&model=am-100

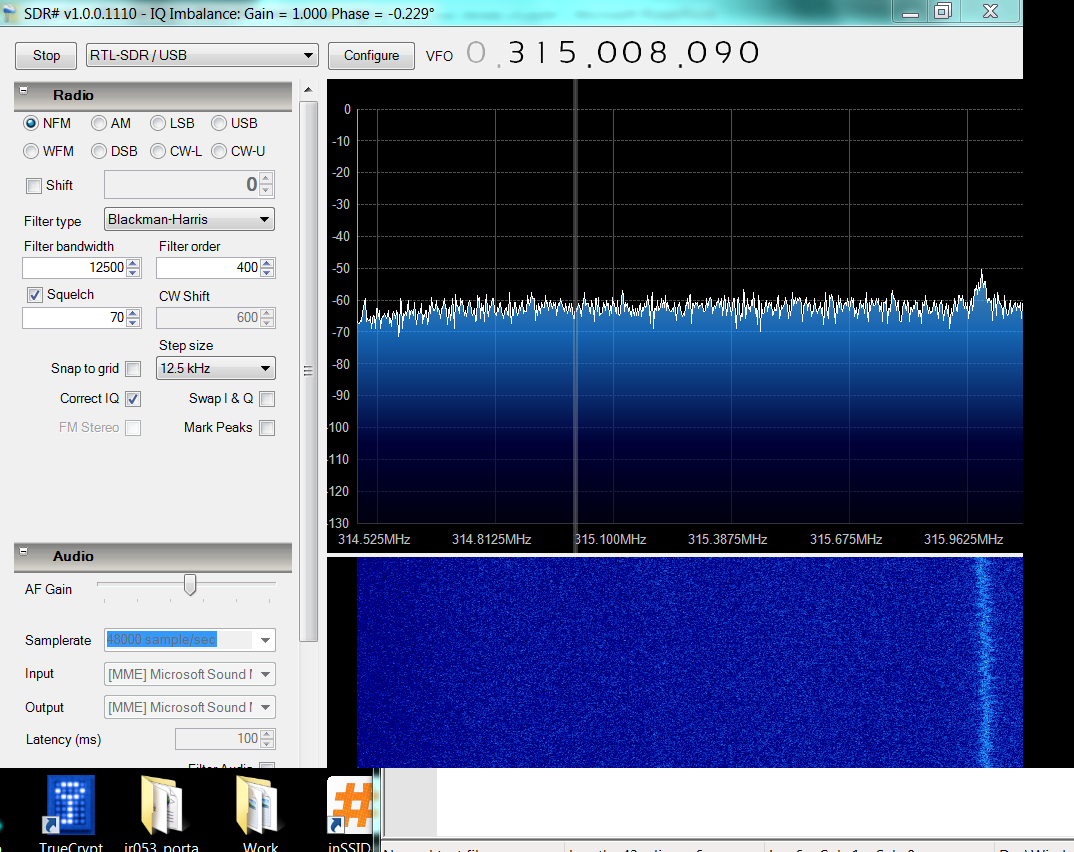
First, I nmapped the IP address.


Port 80 and 443 are for downloading application (which allows you to share your screen), management, and remote view (you don't have to look at the TV screen, you can also view shared screen via browser)

I started doing packet capturing and filtering some of the stuff.

I noticed that ports 3268 and 289 were used by the desktop app to communicate. The desktop app sent wppaliveROCK and the server replied with wppaliveROLL.

Port 515 is used by the server to receive screen/screen updates from user's computer.

Their datasheet or configuration document has more information about these ports.


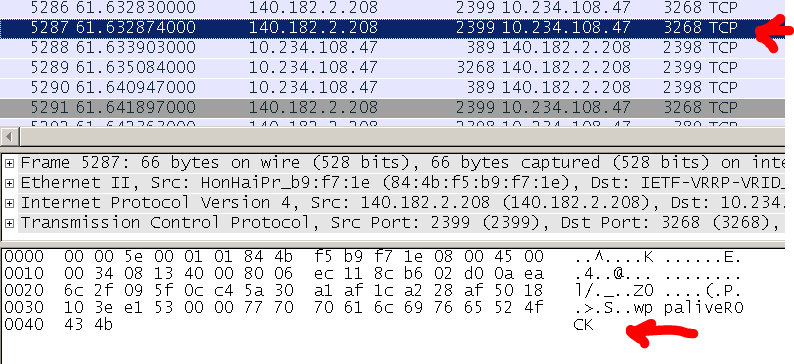
Here's the correct code being sent. This doesn't really matter because as soon as the person disconnects, the code changes.


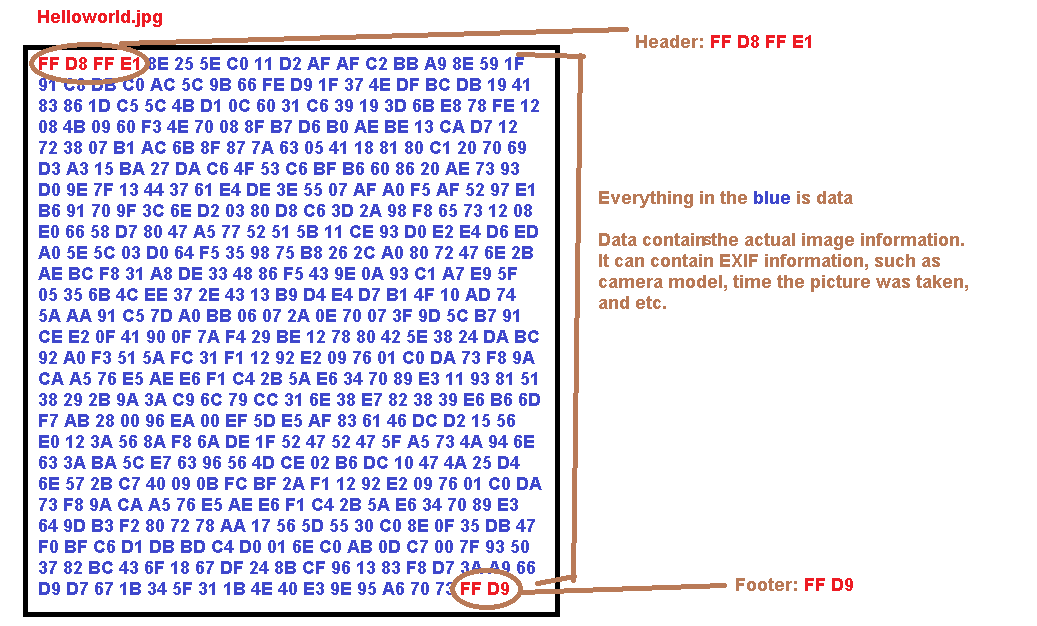
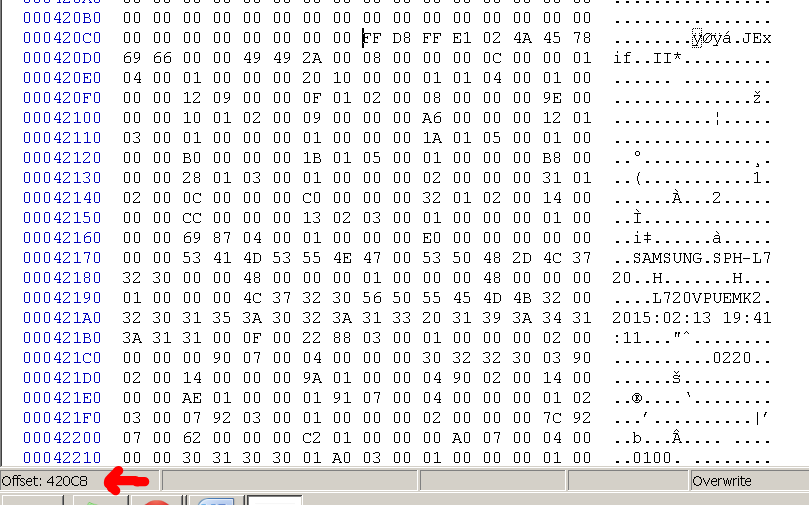
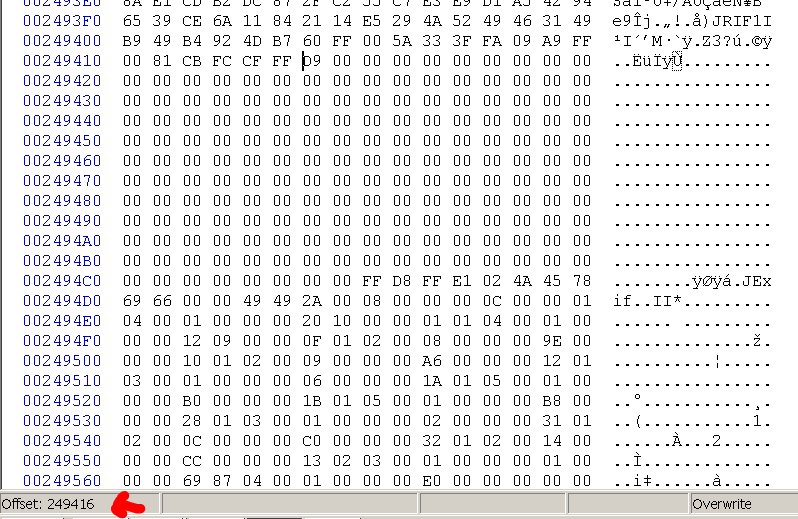
Computer starts using port 515 after the connection is done. At the time, I was new to forensics or any type of file analysis. I noticed JFIF, instead of realizing it was jpg, I Googled it and found out that it was jpg.


(source: GaryKessler.net)

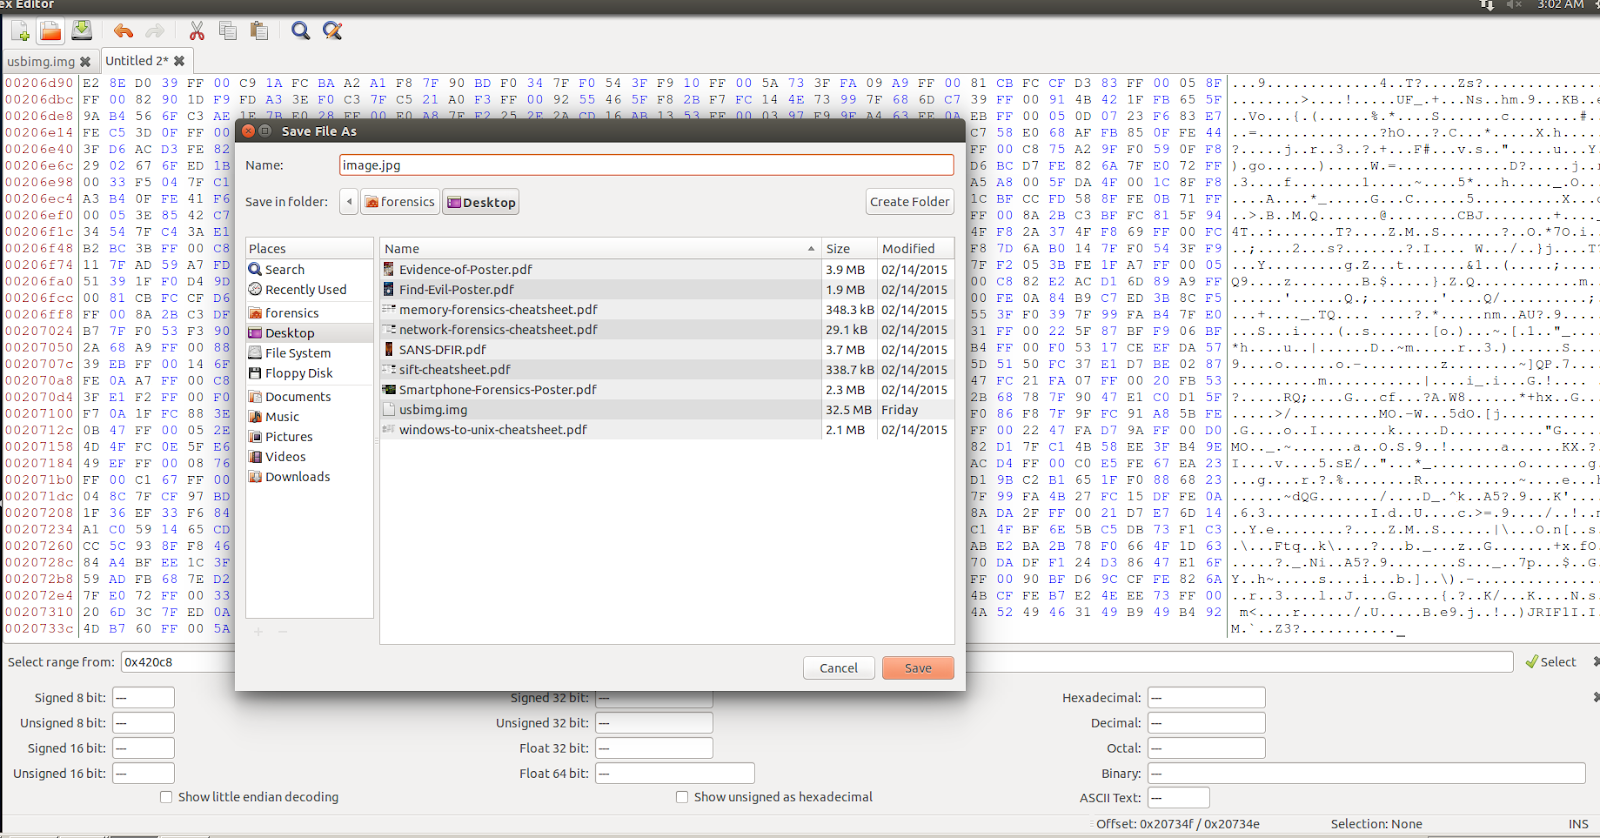
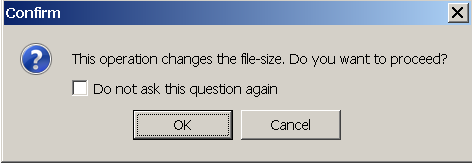
I decided to figure out how to extract images automatically.
I was familiar with python and had heard of scapy before.
I knew that part was 515 and I learned about binascii library while researching.

from scapy.all import *
import binascii

pcap=rdpcap("correct_pcap.pcap")

allthestuff = ""

for i in range(len(pcap)):
    if (pcap[i].dport == 515):
       dstpacket = pcap[i]
       if Raw in dstpacket:
            allthestuff = allthestuff + str(pcap[i].load)

startaddr = ''
endaddr = ''
startaddrlist = []
endaddrlist = []

for i in range(len(allthestuff)):
        if (i > len(allthestuff)-4):
                break
        else:
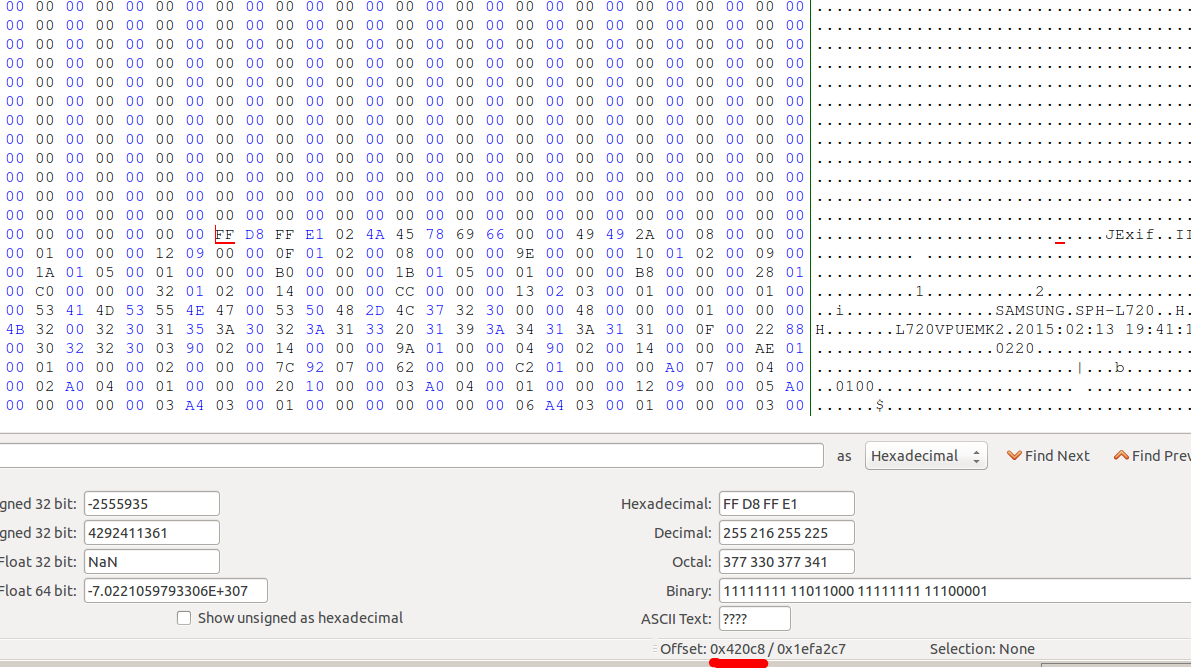
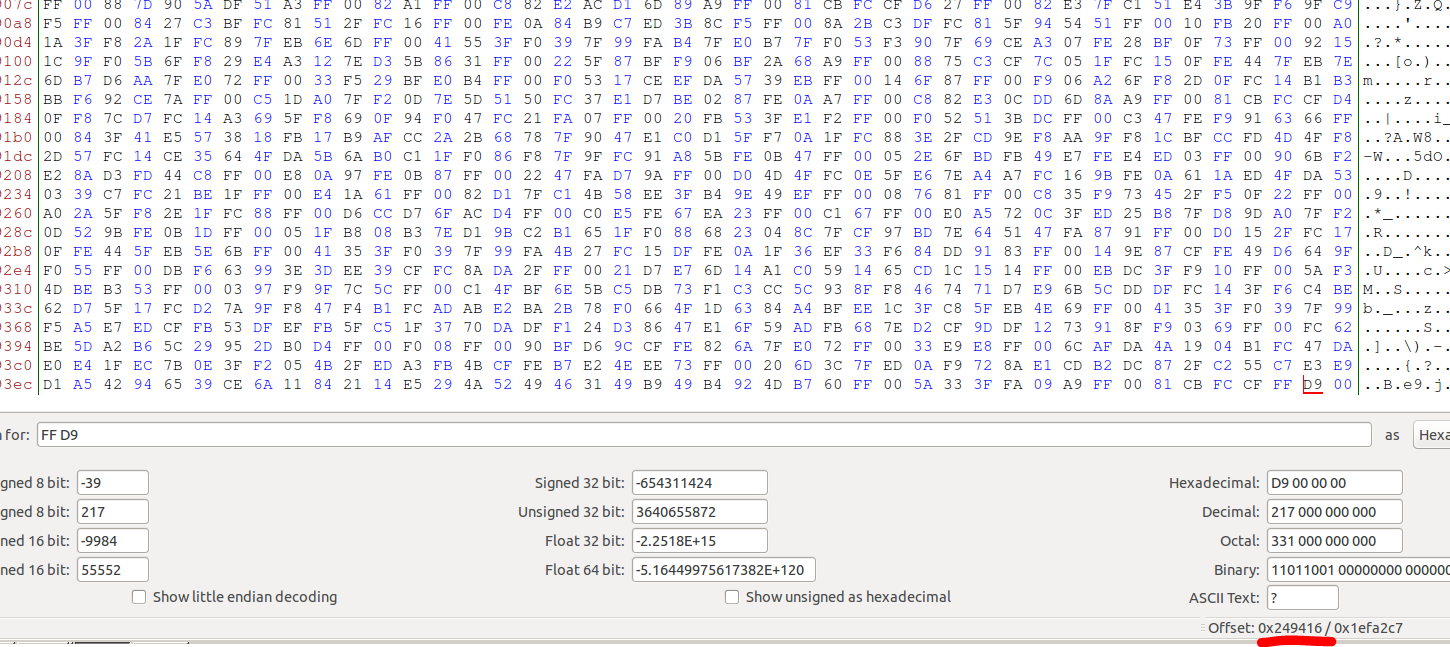
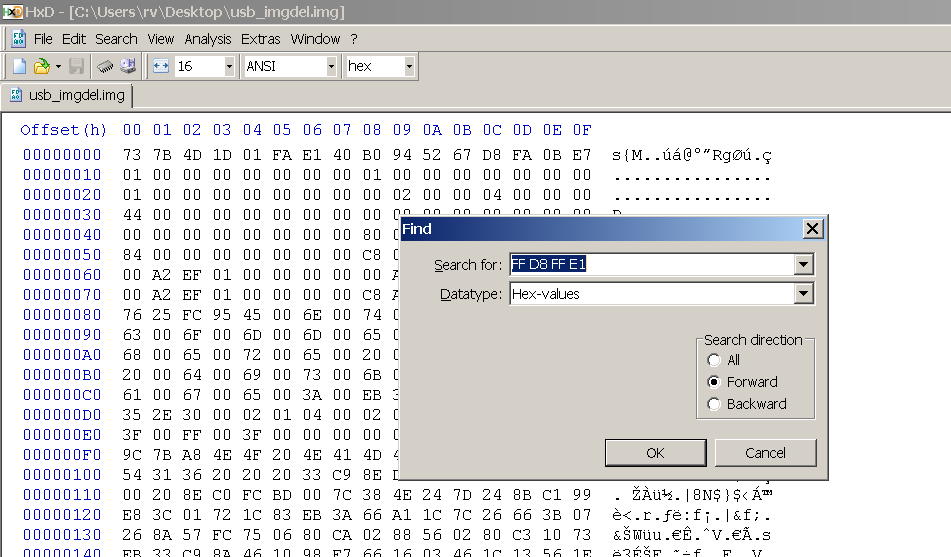
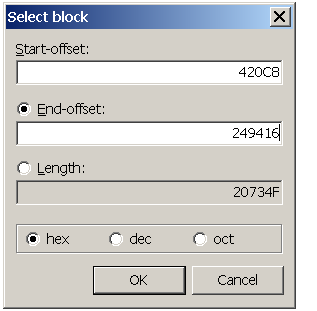
                if (binascii.hexlify(allthestuff[i] + allthestuff[i+1] + allthestuff[i+2] + allthestuff[i+3]) == "ffd8ffe0"):
                        startaddr = i
                elif (binascii.hexlify(allthestuff[i] + allthestuff[i+1]) == "ffd9"):
                        endaddr = i+2
                        startaddrlist.append(startaddr)
                        endaddrlist.append(endaddr)


for i in range(len(startaddrlist)):
 outfile = open("img"+str(i)+".jpg", "w")
        outfile.write(allthestuff[startaddrlist[i]:endaddrlist[i]])
 outfile.close()

print "done extracting images"
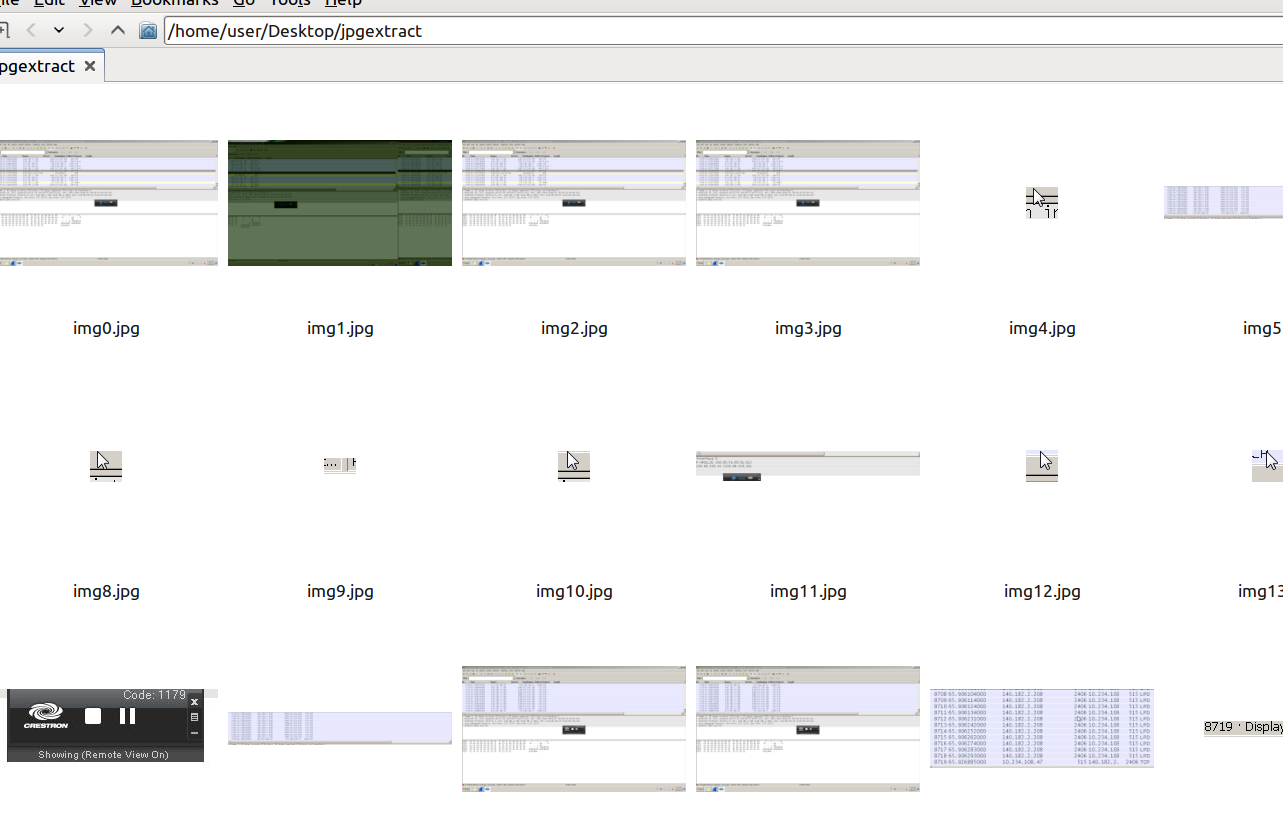
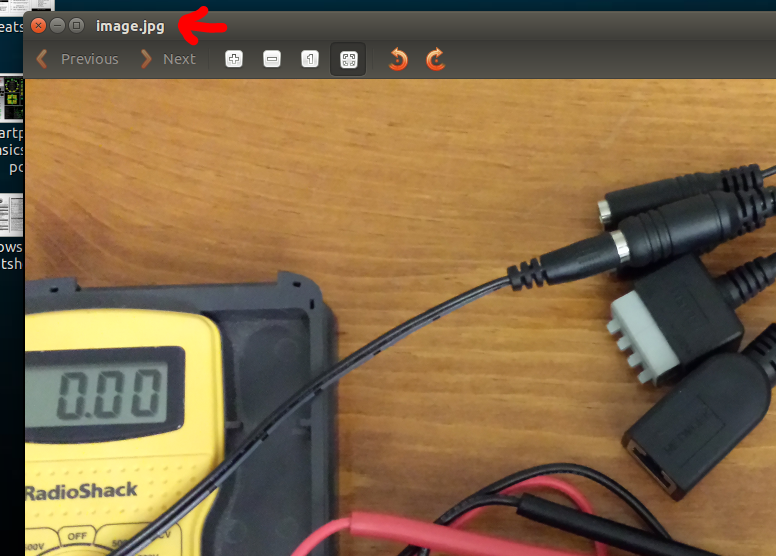
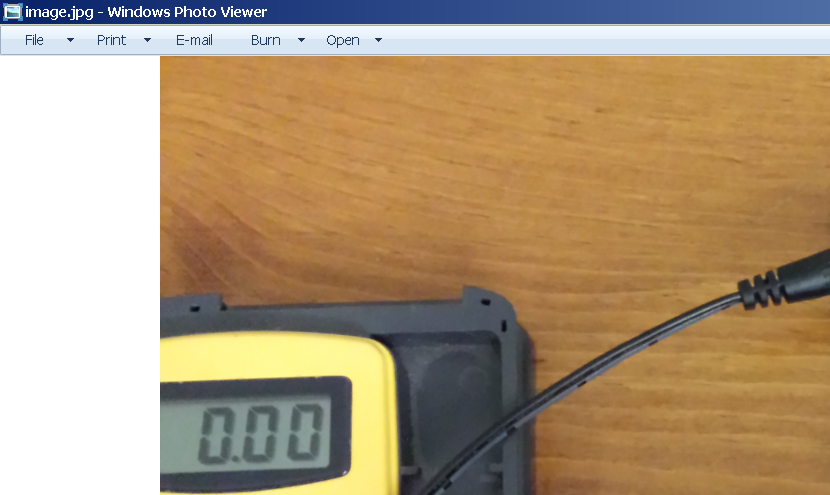
Here's the output:


Saturday, February 20, 2016

How we broke into your house

For my wireless security class (CIT 460) some friends and I did final project on hacking alarm systems. This was in Spring 2014. I did this because I had RTL-SDR dongle and I wanted to do something cool with it. Also a lot of cool stuf was already coming out from RTL-SDR research (I went to /r/rtlsdr a lot.) not to mention stuff like rfcat by atlas of doom. Another reason was that, people in this class always did 802.x related (wifi, bluetooth, and etc.) research and that was no longer interesting to me. 

We titled the presentation "How we broke into your house."

Here is threat identification:

  • Threat agent: burglars
  • Threat model: breaking and entering
  • Attack tree
    • Breaking in
      • Jamming
        • Requires attacker to find the alarm frequency
      • Disarming
        • Replay attack
          • Requires attacker to find the alarm frequency
          • Requires attacker to record the "disarm" signal
Some terms:
  • TX = transmitter / transmit
  • RX = receiver / receive
  • Transceiver = can transmit and receive
  • AM = Amplitude modulation
  • FM = Frequency modulation
  • SDR = software defined radio
ISM Band and importance of sub-GHz frequencies:
Many devices use sub-GHz ISM band.
Devices such as alarms, garage door openers, temperatures sensors, and etc. use this.

Communication methods:
  • ASK - amplitude shift keying (uses AM to transfer data)
  • AM - amplitude modulation
  • FM - frequency modulation
  • FSK - frequency shift keying (uses FM to transfer data)
  • OOK - On-Off keying (a form of ASK)
Methodology for researching and hacking the alarm system(this worked for what we did, it doesn't mean it will work for every one else):
  1. Get frequency
    1. FCC ID
    2. Frequency lookup
    3. Google
    4. Hardware pieces or datasheet
  2. Get modulation type
    1. Same resources to get frequency
    2. Signal comparison with RTLSDR's Signal ID guide/wiki
  3. Collection
    1. Collect the signal multiple times (helps to see if there is a pattern or not)
  4. Analysis
    1. Audacity
      1. Binary data - get low and highs (at least for OOK)
      2. Baud rate - 1 / (end time of a bit - start time of a bit)
        1. Datasheets can also help
    2. Binary to hex
      1. Use tools to convert binary data from your analysis to hex
    3. Look for patterns
      1. This was easy because "disarm" signal was the same every time
  5. Attack
    1. Since the disarm signal was the same every time, we could do a replay attack
    2. Doing replay attack
      1. Start rfcat
      2. Set correct frequency
      3. Set correct modulation
      4. Set correct baud rate
      5. Input your code to transmit
      6. Transmit
Tools we used:
RTL-SDR dongle (60-2000MHz RX)
Ham radio ( just to demonstrate jamming )

CC1111 (TX/RX with Rfcat)

SDR# (to capture signals)
Audacity (to look at the signals)
RFCat (to replay signal)
alt

Alarm system:
I bought the alarm system from Amazon. It was cheap, I think around $50.
As you can see below, it as a receive and no transmitter
There are also four holes on middle right-hand side of the picture. I thought those were serial but I was not able to connect and get anything.


Doing the attack:
We knew the device frequency was around 433MHz because it was advertised on Amazon.
We used SDR# to find the exact frequency with was 433.800MHz.

To find the modulation type, we looked up part number on the transmitter and found a similar part that used ASK/OOK.

We captured the signal with the right configuration in SDR# and opened it with Audacity. We printed the Audacity visualization and started marking 0's and 1's on it.

We used Audacity and our captured data to find the baud rate.

The numbers in the paper picture below are bit different because we took the screenshot afterwards when we were making the presentation.

We converted the binary data from Audacity output and converted it to hex.

Here's what we did to perform the actual attack. 
RFCat was well documented so we used that. Later we found out that it was a lot easier to do the attack with an Arduino. There was a library that captured data for you and decoded it and the same library allowed you to transmit it. (I think it was https://github.com/ninjablocks/433Utils )

We also had tell the class what some mitigation techniques.
We came up with:
  • Frequency hopping
  • Non-repeating signal
  • Jam detection
This was done in early 2014. I am sure there are better ways to do this now.

If I made any mistakes in the post, leave a comment below. I don't typically work with radios.

Sorry for bad writing style. I am trying to improve.

Friday, February 19, 2016

JPEG extraction

This post is about JPEG extraction lab/exercise.
(If the formatting is messed up, it's because it's my first post. I'm trying to get used to the editor)

Concept


JPEG file has a header and a footer. This can used to extract the JPEG file from the disk image.
Format of JPEG file on disk (hex):
alt


How carving works (this is obviously very simplified):

alt


Extraction using bless hex editor

1. Open Bless Hex Editor
2. Open your disk image file
3. Search for the JPEG header (FF D8 FF E1)
4. Note the start address of the header. Screenshot below has the start address underlined. It’s 0x420c8.
5. Find the footer and note the end address of it. For the screenshot below, the address of footer is 0x249416. Our image file is between the start of header address and end of footer address.
6. Select the hex data between the noted addresses. (Hint: Edit -> Select Range)
7. After the hex data is selected, copy it. (Edit -> Copy)
8. Create a new empty file.
9. Paste the hex data into the new file
10. Save the file as image.jpg
11. Open the jpeg file to confirm that you’ve successfully extracted it.


Extraction using HxD


1. Open the disk image using HxD.
2. Search for the header.
3. Note the header start address.


4. Search for footer and note its end address.
5. Select the hex data between header and footer addresses. (Hint: Edit -> Select block)
6. Copy the selected block.
7. Create a new file and paste the data. Click Ok when this message box shows up.
8. Save the file as image.jpg
9. Open the file to confirm a successful extraction.


My resources


http://www.garykessler.net/library/file_sigs.html